Showing posts with label kids project. Show all posts

Saturday, February 11, 2012

vintage valentine's

With Valentine's Day only 3 days away you may be thinking about what you can do that is special and unique for your loved ones?  My sister was home making old fashioned Valentine's with my nieces last night (just like our mom did with us as kids).  We were looking at images of vintage Valentine's this week at work and and really today's commercial imagery just does not compare.  I thought I would share a few of the images with you here.  Why not print some out and make your own homemade Valentine's? Vintage Holiday Crafts has so many great free images to use, just please be sure to read their rules regarding the use of images.


all above images courtesy vintageholidaycrafts.com

Here’s another great set of vintage Valentine’s Day cards I found on a Flickr stream. [via]
Happy Love Day


Friday, December 23, 2011

still baking...

I've been in the kitchen for most of the day today.  As I mentioned in my previous post, I love to bake and had so many ideas for the cookie swap, that I had to just keep baking knowing I still had people I wanted to gift some home baked goodies to and also have places to bring my goodies to this weekend for Christmas!  I started with a dough that needed to chill so it could sit in the fridge for a few hours while I worked on other goods...the Linzer Tart.  My husband claims his mom made this cookie when he was young and I asked my mother in law for her recipe, unfortunately it is one of those recipes that comes without any measurements.  I decided I will wait for her to come over and watch her make them so I can create a recipe to work from.  For this batch, I found a recipe on the internet that seemed tasty and followed that.  I did however use the "infamous" grape jam my husband grew up with in place of raspberry the folks at Epicurious suggested.  I will caution you, this dough is very delicate, but if you have experience with rolled/cut cookies, you should be good.


linzer dough rolled out & cut

making the "sandwiches"!

finishing touches...sprinkle with confectioners sugar


The next two cookies I made were from the 2010 Martha Stewart Holiday Cookies Special Issue.  I love these special issues and never throw them away.  They always have so many good ideas!  The first one is an Italian cookie called Ciambelle (Lemon Wreaths).  They actually look like little doughnuts!  You have to roll the dough out and shape them into wreaths.  It was just like rolling coils in ceramics, very cool.  The best part was dipping them in the lemon glaze and sprinkling on the nonpareils...a very fun cookie to make.  If you have kids they would love to help with this part.


wreaths baked & waiting to be glazed

glazed & drying...mini doughnut anyone?

The next one is bar cookie and was a bit of a challenge at first, but surprisingly easy.  My husband loves eggnog, so when I saw the Eggnog Cheesecake Bars, I thought they would be perfect.  It wasn't until I read I had to bake them in a hot water bath that I got very nervous.  I usually shy away from cheesecake or any recipe that has a "bath" process...but honestly, it was very easy and they came out perfect (I haven't cut them yet, they are still chilling, but they do look perfect!)  


bars in water bath ready to go in oven...I used my turkey roasting pan!

While the bars were baking I was onto a special cookie for my dad.  My grandmother (his mother) used to make a soft raisin cookie, similar to a soft chocolate chip cookie (with raisins instead), but no one in the family has the recipe.  My mother did find a dog-eared recipe card that is "thought" to be the recipe, so I decided to give it a try.  I think they look pretty darn close, however I will have to wait until Sunday for the taste tester to give them a try! 


Dad's raisin cookies cooling

One last item on deck, not really a cookie, but something I remember my other grandmother making and sending my way, Festive Chocolate Pretzels.  I recently thought about these pretzels since M&M introduced the chocolate covered pretzels, of which I can not be left alone with a bag of!  These festive pretzels are so easy to make I even enlisted the help of my husband and we were done in no time.  This is another one kids could easily have a ball with!  I couldn't find the exact recipe I wanted, but with the one I used, I substituted the Hershey's Hugs or Kisses for the Candy Melts you can buy to make your own candies out of.  They are those colored disks they sell many times at stores like Michael's Arts & Crafts.  I bought red ones and then used the holiday red and green M&M's in the center.  I love sweet and salty together so these festive pretzel treats are just perfect.  I plan to make up little cello bags for everyone, and of course keep a few for myself!


Tom placing M&Ms in the melted chocolates

cooled & set...don't forget to save a few for Santa!

I still plan to make a banana pudding for dessert Christmas Eve and bread pudding for Christmas Day!  
What have you been baking?


Monday, December 19, 2011

holiday baking & sharing

packaged and ready to go!

I love to bake.  So when we were invited to my bff's this past weekend for a holiday party and was asked to bring some festive cookies for a "cookie swap", I was super excited to partake. I was however overwhelmed with choices of what to bake!  There are always so many recipes to choose from, and during the holidays especially, so many fun, festive, and delicious ones!  After a few sifts through my recipe "pile" (I have yet to find the best way to organize my recipes...some are in a folder, others in a binder, some are on my computer, and the others are scattered throughout the internet, friends and family)...I decided to make 2 of my favorites.  I made one of the more challenging "cookies" that I only attempt every few years when I really have the time and patience, petit fours (I used this basic recipe but filled mine with raspberry jam, tinted my frosting green and decorated with red hearts, red flowers and sugar gingermen).  After working at Martha Stewart TV for so many years, I really learned the tricks of these by watching John Barricelli, one of the master chefs in the prep kitchen there, (really I would eat the "scrap bowl" while he was making the beautiful creations!)  They are definitely labor intensive and I have to be honest, I did lose about 1/2 of them in the making...but the 1/2 I "lost", were just not as "pretty" for the swap and they stayed home for my husband and I to enjoy.  The other "cookie" I chose to make was not really a cookie either.  It is one of my favorite recipes from a good friend I used to work with at Martha, the worlds best Gingerbread Cake from Gramercy Tavern!  If you love gingerbread the way I do, I really recommend trying this recipe.  The original one is made in a bundt pan, however I decided to make individual cakes (reducing the baking time accordingly) and package them in cello bags with a cute tag.  Again, this way I could contribute to the swap with a smaller, take away portion.  With so many cookies, I felt the cakes were a great addition at the end of the night for the guests to bring home and eat the next morning, perhaps with their coffee, or share with other family members.  Another great thing about this gingerbread cake recipe is that it just gets better after a day or two!  Making these individual cakes also reminded me of the small loaves of zucchini and banana bread my mom, husband and I made as part of our wedding favors.  We made the breads to go along with jars of currant jam my mom made from the berries my dad grew in his garden.  Small home baked gifts of breads, cakes and cookies are always loved by just about anyone and what better way to spread the love and give thanks to someone during the holidays?  Maybe you have someone on your list you too can bake for.....the dog walker, babysitter, postman, kid's teachers, house keeper, doorman? Kids love to bake too!  Really, who doesn't love homemade AND home baked?  What is your favorite holiday cookie recipe?
individual gingerbreads baked, cooling and waiting for packaging
this years petit fours!

my cookie swap box to come home!  
note the festive gingerbread owl peering out made by my bff (and the host) Sweet Dani B!
Whooos ready for the holidays now?

Monday, August 1, 2011

what are friends for?

Dan's excellent friendship bracelets worn proudly by her husband Keith (photo by SDB)

A few weeks ago my bff Dan invited us to her shore house at the Jersey Shore for the weekend.  As we packed up the usual...food, clothes, beach chair, etc....I packed an extra bin for our "beach activity".  I had been seeing everywhere the resurgence of "the friendship bracelet" and I thought what a perfect activity for us to re-learn on the beach while working on our tans.  I don't know about you, but I was obsessed with making these bracelets growing up!  I would spend all summer making bracelet after bracelet.  So I got excited and went and bought the largest collection of embroidery floss I could find at Michael's (I had a 50% coupon, bonus!) and then I proceeded to print out several patterns for us to follow.  Now I didn't go and print the basic stripe or chevron that I remembered so fondly from my teens...I thought to myself, we are artists and master crafters, who needs the basics!  I am going straight for the expert patterns!  I did watch a simple YouTube video that was very informative on the 4 basic knots you need to know.  So I figured, if I could teach my partner in crime the basic knots, then we could just follow the patterns and be on our way!  Like riding a bike, it would all come back...or so I hoped!  So when I got to the beach I was very excited to see that Dan and her sister-in-law-to-be Nicole was also excited to get started on making some friendship bracelets.  We all picked our colors and I gave the basic knot making tutorial.  Then we all picked out these detailed hearts patterns to follow.  This is when I realized I probably should have read up a little bit more on the process.  I think my excitement got the best of me and I skipped a few steps.  We struggled a bit trying to read the patterns.  The more detailed the bracelet, the more advanced the pattern is and naturally the harder it is to make.  Not really the "mindless" bracelet making we were looking forward to for our first friendship bracelet on the beach after all those years!  While I tried my hardest to stick to the hearts pattern and teach them to Nicole and her friend who also joined us that day, Dan had a flash back to when she was a teenager and actually remembered how to make the basic chevron, or v pattern.  She decided to follow her instincts and let the string lead her along.  Later that day I figured out how to make the basic stripe pattern as well.  I put aside my half started heart bracelet, and started a new bracelet with 12 strings, 3 different colors (4 of each color) for my husband Tom.  It took me a while to get in the groove, even with the simplest pattern!  I actually took it home and worked on and off at if for a while...but after I sat there and committed to it, I finished and felt a great sense of accomplishment.  I actually made it too long and had to go back and take out a few rows to fit it to his wrist!  I then moved on to an inverse chevron and chose 2 colors I thought would compliment Tom's first bracelet.  Last night I tied them both on his wrist and felt like a giddy school girl all over again.  If you are interested in making some of these bracelets I recommend starting out with one of the basics and then moving on to a more advanced one.  There are so many fun patterns out there!  I found watching the YouTube videos/tutorials people have posted were the most helpful, I guess that comes from being a visual person!  Some of the paper patterns I was reading seemed to get very confusing.  Hollistergirl101 has a basic chevron and an inverse chevron video that I thought was very easy to follow.  For the basic diagonal stripe, check out this page at  Friendship-Bracelets.  They also have a pattern for any other bracelet you have probably seen!

The bin that started it all

Dan "listening" to the string

Nicole giving a go at the diagonal stripe & using her morning coffee to keep the bracelet in place!

Dan's dog Hope modeling the latest pet fashion!  This one was made in her fur/skin colorway!
(photo by SDB)

I took my bracelet with me on the train and used a safety pin to attach it to my bag!

Dan developed a new pattern while teaching the technique to our friend Janine! (photo by SDB)
 When I was researching I found that the knot tying technique used to make friendship bracelets is actually a form of macrame.  The making of friendship bracelets originated in Central America and was first seen in the US in the early 1970s.

She also discovered GOLD embroidery floss! (photo by SDB)

My first 2 finished bracelets on my husband Tom!  According to the tradition, the recipient must wear the bracelet until the cord wears out or naturally falls off to honor the hard work and love his/her friend put into making it.
 ♥
* a special thanks to Dan (Sweet Dani B) for documenting her friendship bracelet making & letting me share some of her photos with you all here!  
Let us know if you too have gotten bit by the "friendship bracelet making bug"!

Friday, May 6, 2011

learn something sweet and new

My bff & cookie decorating extraordinaire is at it again!  She is offering another one of her cookie decorating parties next weekend in Hoboken, NJ.  This Spring themed workshop not only includes the "sweet" cookies and decorating supplies...you also get one Sweet Dani B Class Kit....How sweet is that?
Dani will share all of her expert tips, techniques and advise while you get to ice away on your fabulous cookie creations.  Of course you get to take home whatever you don't eat :) 
Don't worry, Dani will also have some of her own pre-packaged cookies for sale which make perfect gifts and favors!

What a unique Mother's Day gift or just the perfect opportunity to learn something fun and new!

To find out more about Dani's others products and services such as event design, paper goods, online videos, and cookie favors...check out her entire website here http://sweetdanib.com/

Oh...and I'll be there joining in on the sweet day as well.  Mel's Peanut Butter Bisquits are making their sale debut and part of the proceeds will be donated to the Yonkers Animal Shelter to help with the day to day needs of the dogs in the shelter.  To read more about the story of "Mel's Bisquits" check out my blog post from February.

Hope to see you Saturday, May 14 at City Bistro in Hoboken, NJ for one SWEET afternoon!

Sunday, March 20, 2011

can you really balance an egg on its end?


Today is the Vernal Equinox ( Vernal meaning "spring" and Equinox meaning "equal night"); which is the first day of spring in the Northern Hemisphere.  Many of us here on the East Coast have been looking forward to spring after a very long, cold, snowy winter!  Yesterday I was having a conversation with my family about how it has been said that on the Equinox it is supposed to be easier to balance an egg on its end than any other day of the year!  I must admit, I have tried it in the past and had no luck...but it did get me thinking, so I decided to get to my computer this morning and start a "Google" search!  I found many scientific explanations...but perhaps I can best sum it up like this.  "This Vernal Equinox is one of the two times during the year when the sun crosses the celestial equator and the spin axis of the Earth points 90 degrees away from the sun. The premise is that aligning the gravitational pull of the Sun with that from the center of the Earth should somehow make it easier to balance any object." (courtesy of Anne Marie Helmenstine, Ph.D)

So tonight I think I may give it another try...why not?  I have a dozen fresh eggs in the fridge from the farmers market...and what if it actually works?  What do you believe?  Have you ever given this little test a try?  Or perhaps you may think it's just another urban legend?

Sunday, February 6, 2011

for the birds

glittered pinecones (not for birds!)


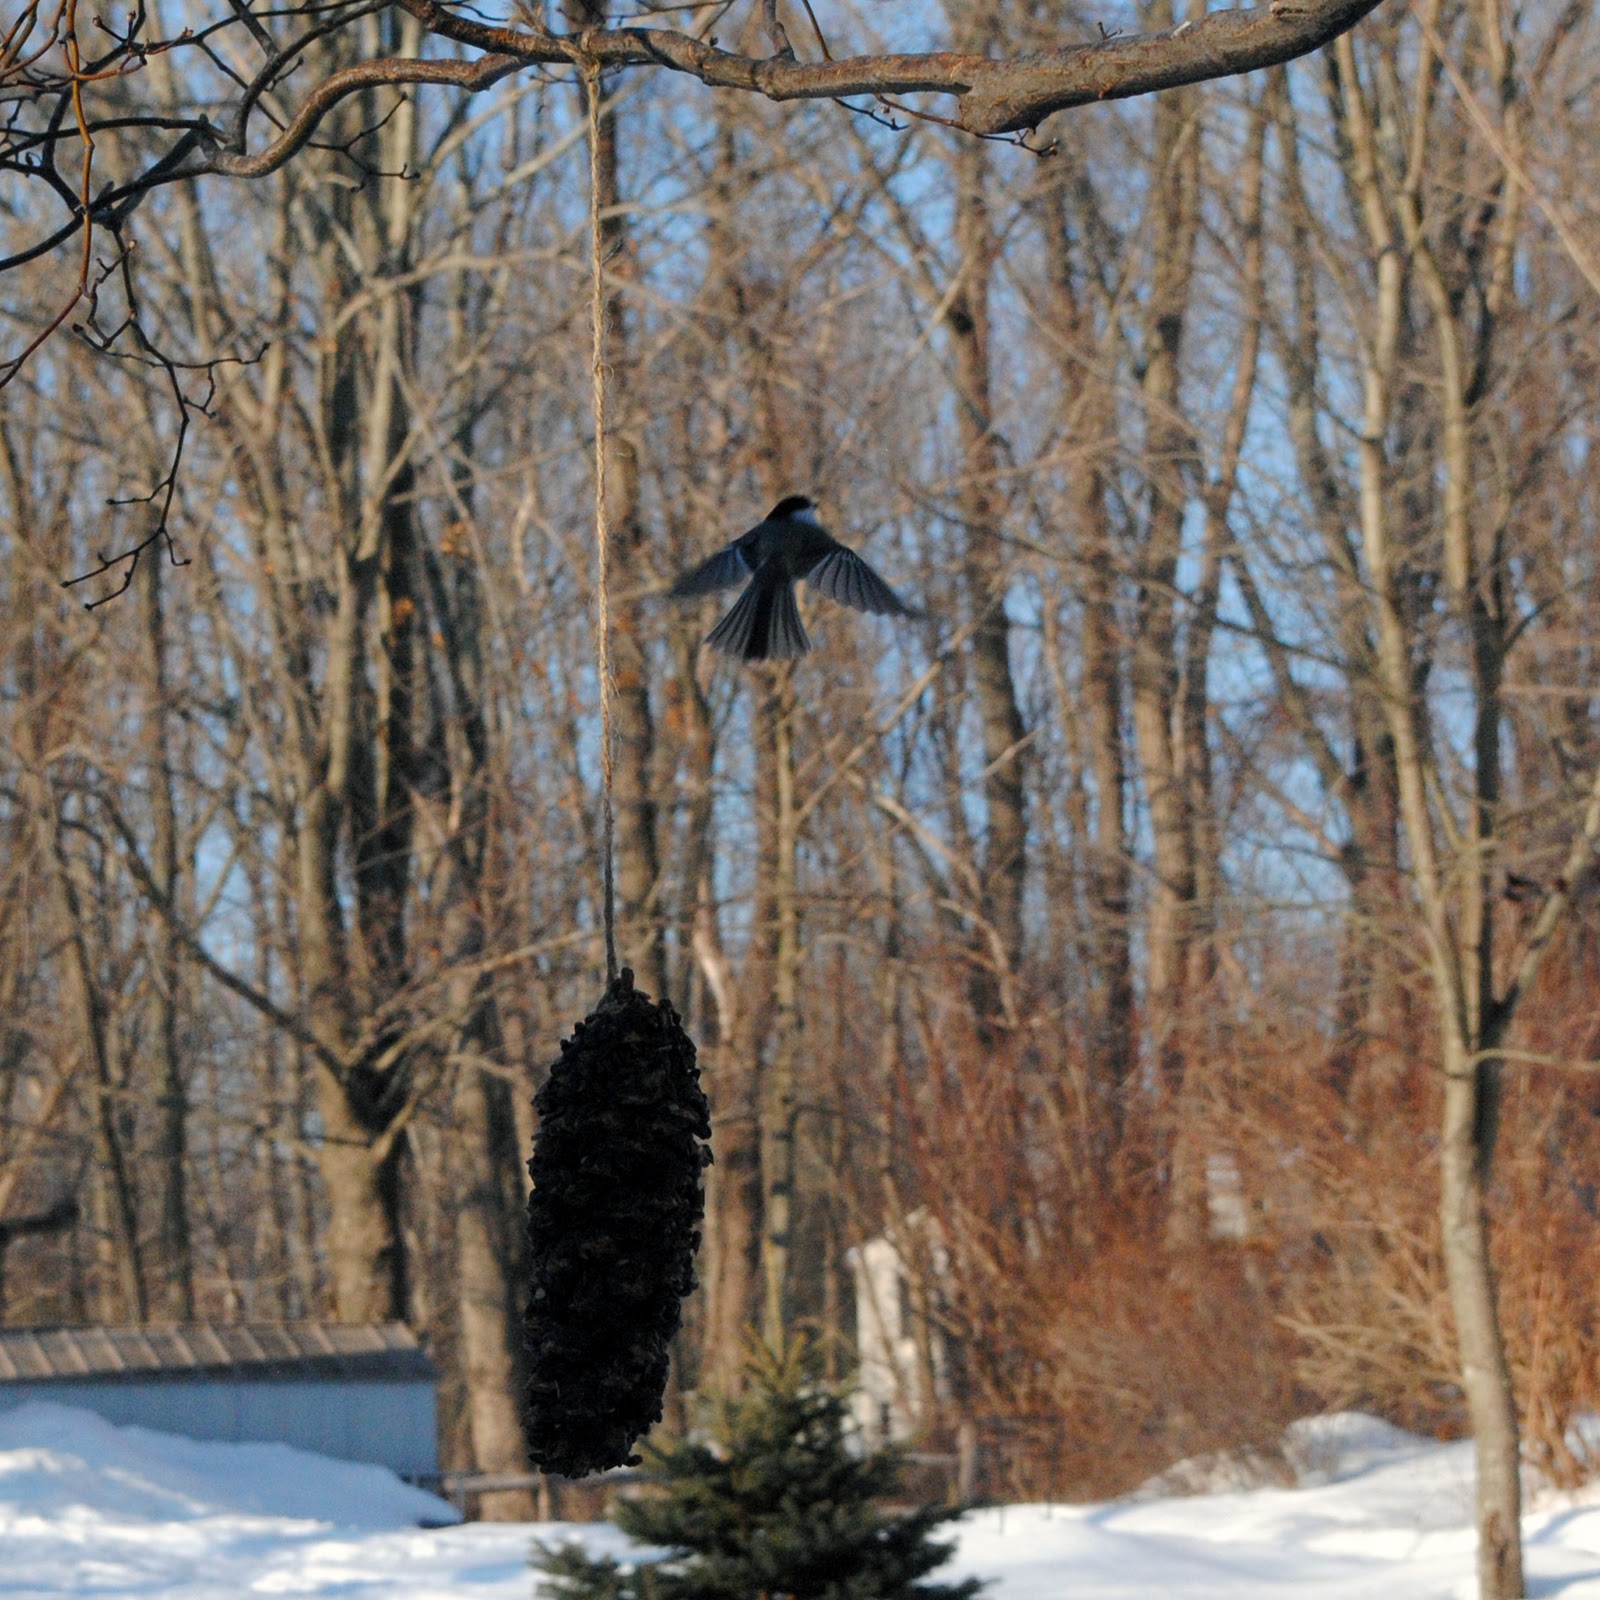
This past holiday season I made glittered pinecones for some craft fairs, to give as Christmas presents, and to hang on my own Christmas tree.  I recently stumbled upon some of the extra pinecones I had not glittered and decided to craft them into something we used to make as kids...pinecone bird feeders!  With all the snow we have been having, the birds have been flocking to our feeders, so I figure why not give them something new and different to feast upon!  These feeders are super easy to make, and if you have kids, so much fun for them to make with you.  All you need are some pinecones, peanut butter (you can use shortening or softened suet if you have nut allergies), twine, plastic knife, bird seed and a paper plate or two. 


Tie a piece of twine securely to the stem side of your pinecone

Use a plastic knife to apply peanut butter in the openings of the pinecone

Over a paper plate, roll the pinecone in birdseed.
I used black oil sunflower seed and pressed the seeds into the 
peanut butter with my hand.

Hang your feeder near the end of a tree branch ...the further out you put it,
the less likely a squirrel will be able to get it!
Wait...and birds will come :)

A very happy customer!  Now off to identify my feathered friends. 
xo


Thursday, August 26, 2010

old fashioned fun with queen anne's lace


When we were kids we always picked Queen Anne's Lace (Daucus Carota), also known as Wild Carrot, (and a member of the parsley family...really?  who knew?) on our many walks.  It seemed to grow everywhere and made some of the prettiest flower bouquets. When I was in Pennsylvania with my niece this summer she came back from a walk with her mother and low and behold, she had a handful of Queen Anne's Lace!  My sister, being a school teacher, as well as "super mom", as I like to call her, had a special project in mind for the afternoon (something we also used to do as kids with our parents).  She called it a "science experiment" to spark the interest of my four year old niece and her 10 year old second cousin, and showed them how to turn the pretty white blooms into fancy colorful flowers.  


Step 1: 
Cut stems of Queen Anne's Lace.


Step 2: 
Fill a cup with water and add several drops of food coloring.  The more coloring you add, the more intense your flowers will turn.


Step 3: 
Place the flowers in the cup, cut side down, and wait 24-48 hours. The color will intensify with more time.  Checking the flowers often to see the "progress" is all part of the fun!


queen anne's lace in blue food coloring


queen anne's lace in red food coloring


Note: 
To turn flowers more than one color, use several different cups, one for each color.
Food coloring can temporarily discolor skin and may stain clothing.  Parents should assist children with this project.  Have fun!